Arch Linix Installation Guide
현재 가지고 있는 시스템 위주로 설명한다.
부트 디스크 만들기
ISO 파일을 다운로드 한다. 다운로드 후 필요한 경우 gpg 명령으로 파일을 검증한다.
gpg --keyserver-options auto-key-retrieve --verify archlinux-2020.11.01-x86_64.iso.sig
아래와 같이 Can't check signature: No public key 에러가 발생하면
gpg --keyserver-options auto-key-retrieve --verify archlinux-2020.11.01-x86_64.iso.sig
gpg: assuming signed data in 'archlinux-2020.11.01-x86_64.iso'
gpg: Signature made Sun 01 Nov 2020 03:42:16 PM KST
gpg:                using RSA key 4AA4767BBC9C4B1D18AE28B77F2D434B9741E8AC
gpg: Can't check signature: No public key
아래와 같이 키서버를 지정해 준다.
gpg --keyserver-options auto-key-retrieve --keyserver=hkp://pool.sks-keyservers.net --verify archlinux-2020.11.01-x86_64.iso.sig
부트 디스크 생성
dd bs=4M if=~/Downloads/archlinux-2020.11.01-x86_64.iso of=/dev/sdb status=progress oflag=sync
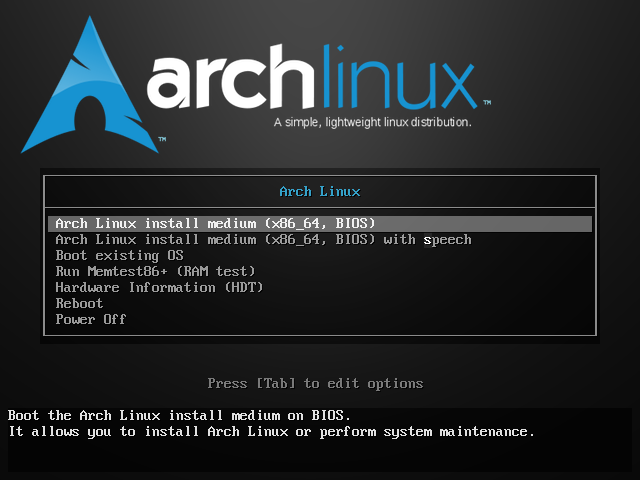
부트 디스크로 부팅한다.
Prerequisite
부트 디스크로 부팅 후 쉘이 뜨면 부팅이 완려 된것이다. 설치를 위한 사전 준비 작업을 시작한다.
네트워크 연결 확인
아래 명령으로 네트워크 연결을 확인한다.
ip link
ping -c 3 google.co.kr
아래와 같이 ping이 성공 하면 네트워크 연결이 성공한것이다.
ping -c 3 google.co.kr
PING google.co.kr (172.217.161.67) 56(84) bytes of data.
64 bytes from nrt20s09-in-f3.1e100.net (172.217.161.67): icmp_seq=1 ttl=116 time=46.8 ms
64 bytes from nrt20s09-in-f3.1e100.net (172.217.161.67): icmp_seq=2 ttl=116 time=39.2 ms
64 bytes from nrt20s09-in-f3.1e100.net (172.217.161.67): icmp_seq=3 ttl=116 time=39.2 ms

--- google.co.kr ping statistics ---
3 packets transmitted, 3 received, 0% packet loss, time 2002ms
rtt min/avg/max/mdev = 39.260/41.786/46.802/3.546 ms
Update system clock (optional)
timedatectl set-ntp true
Bootstrapping
Partition the disk
fdisk -l /dev/nvme0n1
| Mount Point | Partition | Partition Type | Size | Notes |
|---|---|---|---|---|
| /mnt/boot | /dev/nvme0n1p1 | EFI system partition | 512MiB | |
| /mnt | /dev/nvme0n1p2 | Linux filesystem | 64GB | |
| /mnt/home | /dev/nvme0n1p3 | Linux filesystem | Remainder of the device |
별도의 SWAP 파티션을 생성하지 않는다. SWAP 파티션이 필요할 경우 swap file을 사용한다.
가용 디스크 용량이 충분하기 때문에 시스템이 설치될 파티션(/)과 /home 파티션을 분리 한다.
OS 재설시 /home 파티션을 유지하면서 OS를 설치 할 수 있기 때문에 OS 재설치 시 유리한다.
fdisk, cfdisk, gfdisk 명령 중 원하는 파티셔닝 프로그램으로 파티션을 진행한다.
cfdisk /dev/nvme0n1
Format the partitions
mkfs.vfat -F32 /dev/nvme0n1p1
mkfs.ext4 -j /dev/nvme0n1p2
mkfs.ext4 -j /dev/nvme0n1p3
Mount filesystem
mount /dev/nvme0n1p2 /mnt
mkdir -p /mnt/boot
mount /dev/nvme0n1p1 /mnt/boot
mkdir -o /mnt/home
mount /dev/nvme0n1p3 /mnt/home
Update Mirror List
vi /etc/pacman.d/mirrorlist
아래 라인을 서버리스트 가장 위에 추가한다.
Server = http://mirror.premi.st/archlinux/$repo/os/$arch
Server = http://ftp.lanet.kr/pub/archlinux/$repo/os/$arch
Server = https://ftp.lanet.kr/pub/archlinux/$repo/os/$arch
Server = http://ftp.harukasan.org/archlinux/$repo/os/$arch
Server = https://ftp.harukasan.org/archlinux/$repo/os/$arch
pacstrap
pacstrap /mnt base linux linux-firmware vim networkmanager base-devel man-db man-pages texinfo dosfstools e2fsprogs
Generate /etc/fstab
genfstab -U /mnt >> /mnt/etc/fstab
chrooting
arch-chroot /mnt
ln -sf /usr/share/zoneinfo/Asia/Seoul /etc/localtime
Generating locales
Edit /etc/locale.gen and uncomment en_US.UTF-8 UTF-8. Generate the locales by running
locake-gen
Create locale.conf
echo "LANG=en_US.UTF-8" >> /etc/locale.conf
echo "LC_ALL=en_US.UTF-8" >> /etc/locale.conf
Network Configuration
Set Hostname
echo Coconut > /etc/hostname
add to hosts
127.0.0.1	localhost
::1			localhost
127.0.1.1	coconut.localdomain coconut
Enable NetworkManager service
systemctl enable NetworkManager.service
initramfs
mkinitcpio -P
passwd
Create primary user
useradd -m -G users,wheel -s /bin/bash euikook
Set password to euikook
passwd euikook
Enable sudo command to wheel groups
Run visudo command and uncomment %wheel ALL=(ALL:ALL) ALL
%wheel ALL=(ALL:ALL) ALL
Install bootloader (GRUB)
pacman -Syu
pacman -S grub efibootmgt
grub-install --target=x86_64-efi --eif-directory=/boot --bootloader-id=arch --recheck
Edit /etc/default/grub
grub-mkconfig -o /boot/grub/grub.cfg
Finish bootstrapping
Exit from chroot
exit
Un-Mount mounted directories
umount -R /mnt
shutdown -r now
Post bootstrapping
Intel Microcode
sudo pacman -S intel-ucode
grub-mkconfig -o /boot/grub/grub.cfg
GUI 설치
패키지 리스트 업데이트
sudo pacman -Syu
Gnome 설치
sudo pacman -S xorg-server gnome
sudo systemctl enable gdb
그래픽 카드 드라이버 설치
sudo pacman -S xf86-video-intel
sudo pacman -S nvidia xf86-video-intel
기타 어플리케이션 설치
pacman -S firefox
sudo shutdown -r now
Package from AUR
cd ~/Downloads
git clone https://aur.archlinux.org/yay.git
cd yay
makepkg -sic
Fonts
sudo yay -S ttf-nanum
Google Chrome
sydo yay -S google-chrome
한글 입력 설정
sudo pacman -S ibus ibus-hangul
Terminal에서 ibus-setup 을 실행한다.
ibus-setup
- Input Method에 다른 언어들은 모두 삭제 하고
Korean - Hangul을 추가 한다. - Korean - Hangul을 선택한 상태에서 Preferences를 클릭하여
ibus-hangul설정을 진행한다.- 한영 전환 키 등
Settings > Region & Language > Input Sources
Korean(Hangul)을 추가한다.
한/영 전환키가 없는 키보드에서 Right RALT를 한/영 전환키로 사용하기
몇가지 방법이 있지만 가장 쉬운 방법은 Gnome Tweak 툴에서 다음과 같이 설정한다.
Tweak > Keyboard @ Mouse > Additional Layout Options > Korean Hangul/Hanja Keys > Make right Alt a Hangul key 선택
이유를 확인 해보지는 않았지만 xev 등의 명령으로 확인해보면 RALT 키가 ISO_Level3_shift로 설정 된 경우가 있다. 이 경우 Tweak > Keyboard @ Mouse > Additional Layout Options > Key to choose the 3rd level > Right Alt 선택을 해제한다.
Auto completion for sudo command
~/.bashrc
complate -cf sudo
Logitech Mouse 설정
Install Logiops logiops-git^AUR^
yay -S logiops-git
Create /etc/logid.cfg file as following:
devices: ({
  name: "Logitech Wireless Mouse MX Master 3";

  // A lower threshold number makes the wheel switch to free-spin mode
  // quicker when scrolling fast.
  smartshift: { on: true; threshold: 20; };

  hiresscroll: { hires: true; invert: false; target: false; };

  // Higher numbers make the mouse more sensitive (cursor moves faster),
  // 4000 max for MX Master 3.
  dpi: 3000;

  buttons: (

    // Make thumb button 10.
    { cid: 0xc3; action = { type: "Keypress"; keys: ["BTN_FORWARD"]; }; },

    // Make top button 11.
    { cid: 0xc4; action = { type: "Keypress"; keys: ["BTN_BACK"];    }; }

  );
});
Insync 3.x
Install Insync^AUR^
yay -S insync
재설치 이고 이전 데이터를 모두 가지고 있다면 실행전 이전 머신의 ~/.config/Insync 디렉터리를 복사 하여 덮어 쓰면 이전 설정을 그대로 사용할 수 있음.
rsync -avz -e ssh ${OLDBOX}:/home/${USER}/.config/Insync ~/.config
Autostart with Login
~/.config/autostart/insync.desktop
[Desktop Entry]
Version=1.0
Type=Application
Name=Insync
GenericName=Insync
Comment=Launch Insync
Icon=insync
Categories=Network;
Exec=insync start
TryExec=insync
Terminal=false
X-GNOME-Autostart-Delay=15
Tray Icons^Extention^ 확장을 사용한다면 X-GNOME-Autostart-Delay=15 옵션을 주어야 한다.